

With a little less than two weeks to go before the big day I wanted to be sure to talk Turkey! I personally prefer to wet brine and roast my turkey, but there are a ton of different techniques that you are welcome to research when it comes to cooking a holiday turkey.
When selecting a turkey it is very important to read labels! Some key things to look for include the weight, and whether or not the turkey is pre-seasoned, brined, or saline injected. If pre-brined or saline injected than brining again will just make for a salty cure on the turkey. So I usually get a plain and simple turkey no saline no brine, and for my family we usually cook a 17-20 lb turkey for 5-6 people so we have plenty of left overs! I once heard a good rule of thumb was 1lb per person, but who doesn’t love leftovers! Turkeys are usually frozen solid when you get them, plan for a day of thawing per 4 lbs of turkey, so a 20 pound turkey will need 4 days to thaw out, so plan ahead!
Brining a turkey is easy and creates such nice flavors that can be suited to what you like. Brined turkey’s sometimes cook a little more quickly that an un-brined turkey keep your thermometer handy and remember the meat should be 165°F to be considered fully cooked. My brine recipe is super easy and has my favorite flavors including citrus, sage, and rosemary! You’ll need a container large enough to fully submerge the entire turkey. Like a large roasting pot, and you can use an extra large disposable brining bag to help with clean up later.

A good general brine ratio is 4 quarts of water to 1 cup of coarse kosher salt. And you’ll want to soak your turkey for 12-24hours prior to cooking.
To begin preparing the thawed turkey. Remove it from the packaging, remove the giblets, and neck save those if you want to use them later…I don’t but that’s totally up to you. Rinse the bird, inspect for and remove any errant pin feathers (yes it can happen) and pat dry with paper towels. Put your brining bag in your container and drop your turkey in to bag make sure the the turkey can be fully submerged in the container. Set aside in the refrigerator until brining liquid is ready.
Her is what you’ll need for the brining liquid:
- 4 quarts (16cups) water
- 1c coarse Kosher salt
- 1c. Apple cider
- Zest of 3 oranges and 3 lemons
- 1/2c. Chopped sage
- 2 bay leaves
- 3 sprigs of rosemary
- 1 Tbsp. Peppercorns
- 5 cloves of garlic
- 1 large sliced shallot
On medium heat combine water, salt, and cider. Stir over heat until salt is fully dissolved add remaining ingredients and allow to simmer for 5-10minutes until fragrant. Remove from heat and allow to cool completely!
While you wait for the brine to cool you can take the oranges and lemons that you zested, cut them in half and stuff them into the turkey.
Once brine liquid is completely cooled pour over the turkey. Make sure it is fully submerged. If you need more liquid just use a salt water mix 1c water to 1/4c. Salt dissolved and cooled. Store your turkey submerged in the brining liquid in the refrigerator for 12-24 hours prior to roasting.
Roasting your turkey is actually very easy. The less you mess with it the better it will be! I use a large electric roasting pot on the counter so my oven is free for other things to prepare dinner but you can use a roasting pan in the oven as well.
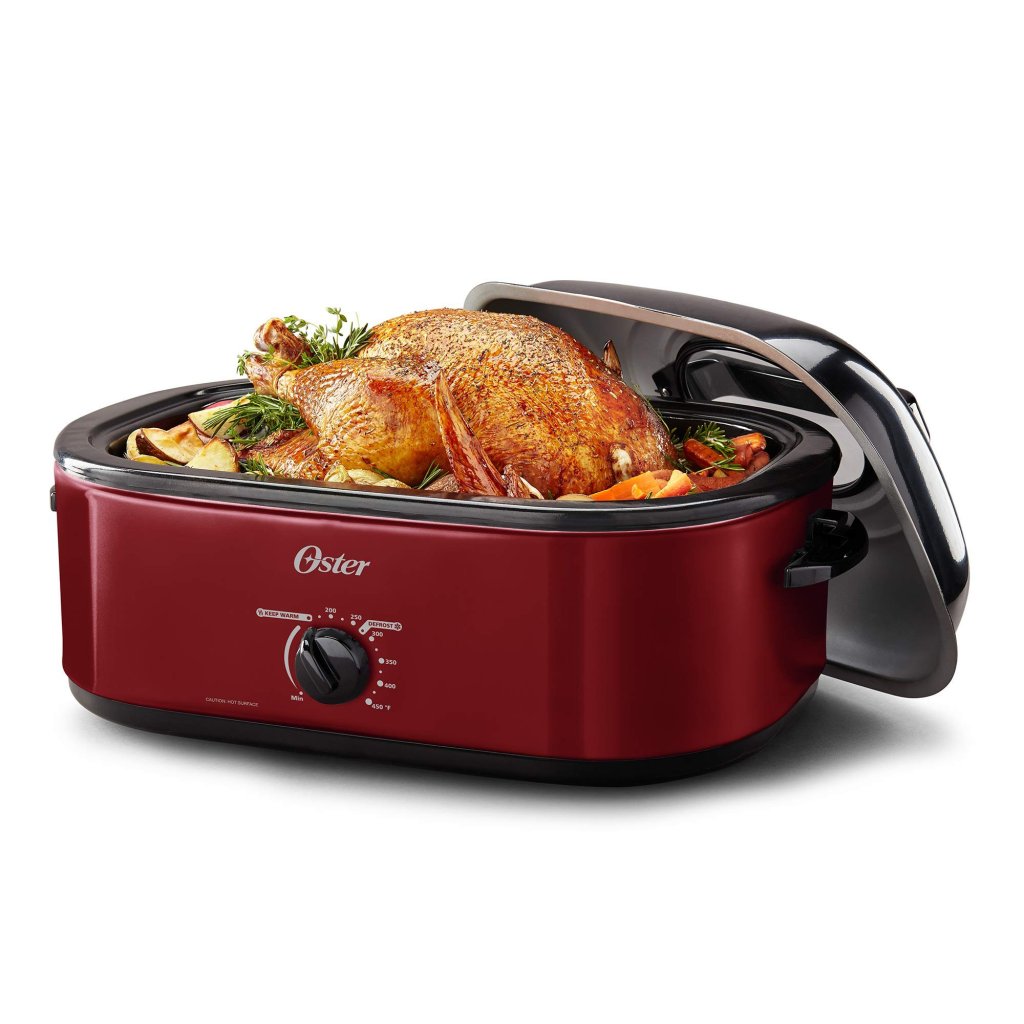
Remove your turkey from the brining liquid, remove the citrus fruit from inside the turkey, stuff the turkey if you want, and I tie the legs together and tuck the wings in so they don’t rest on the hot edges of the roasting pan. Place the turkey in the roasting pan breast up and turn it on to 375°F. You will need to roast the turkey for 1hour per 4 lbs of turkey. So a 20lb turkey needs 4 hours of roasting time. Keep a lid on it! You only need to check on your turkey or baste it 1-2 times during the cooking process. As always check to make sure the internal temperature is 165°F for doneness before removing it from the roaster to carve and serve! Enjoy!


